
I have seen a few people ask this question online with no answers offered so thought I might post up my crazy work around.
Something I noticed when AR Quicklook was first released was elements displayed ‘darker’ when compared the original artwork. My assumption on this is that it takes into account ambient light and tries to make any objects seem less vibrant and cartoony. This of course is a problem when you want elements to be vibrant and cartoony!
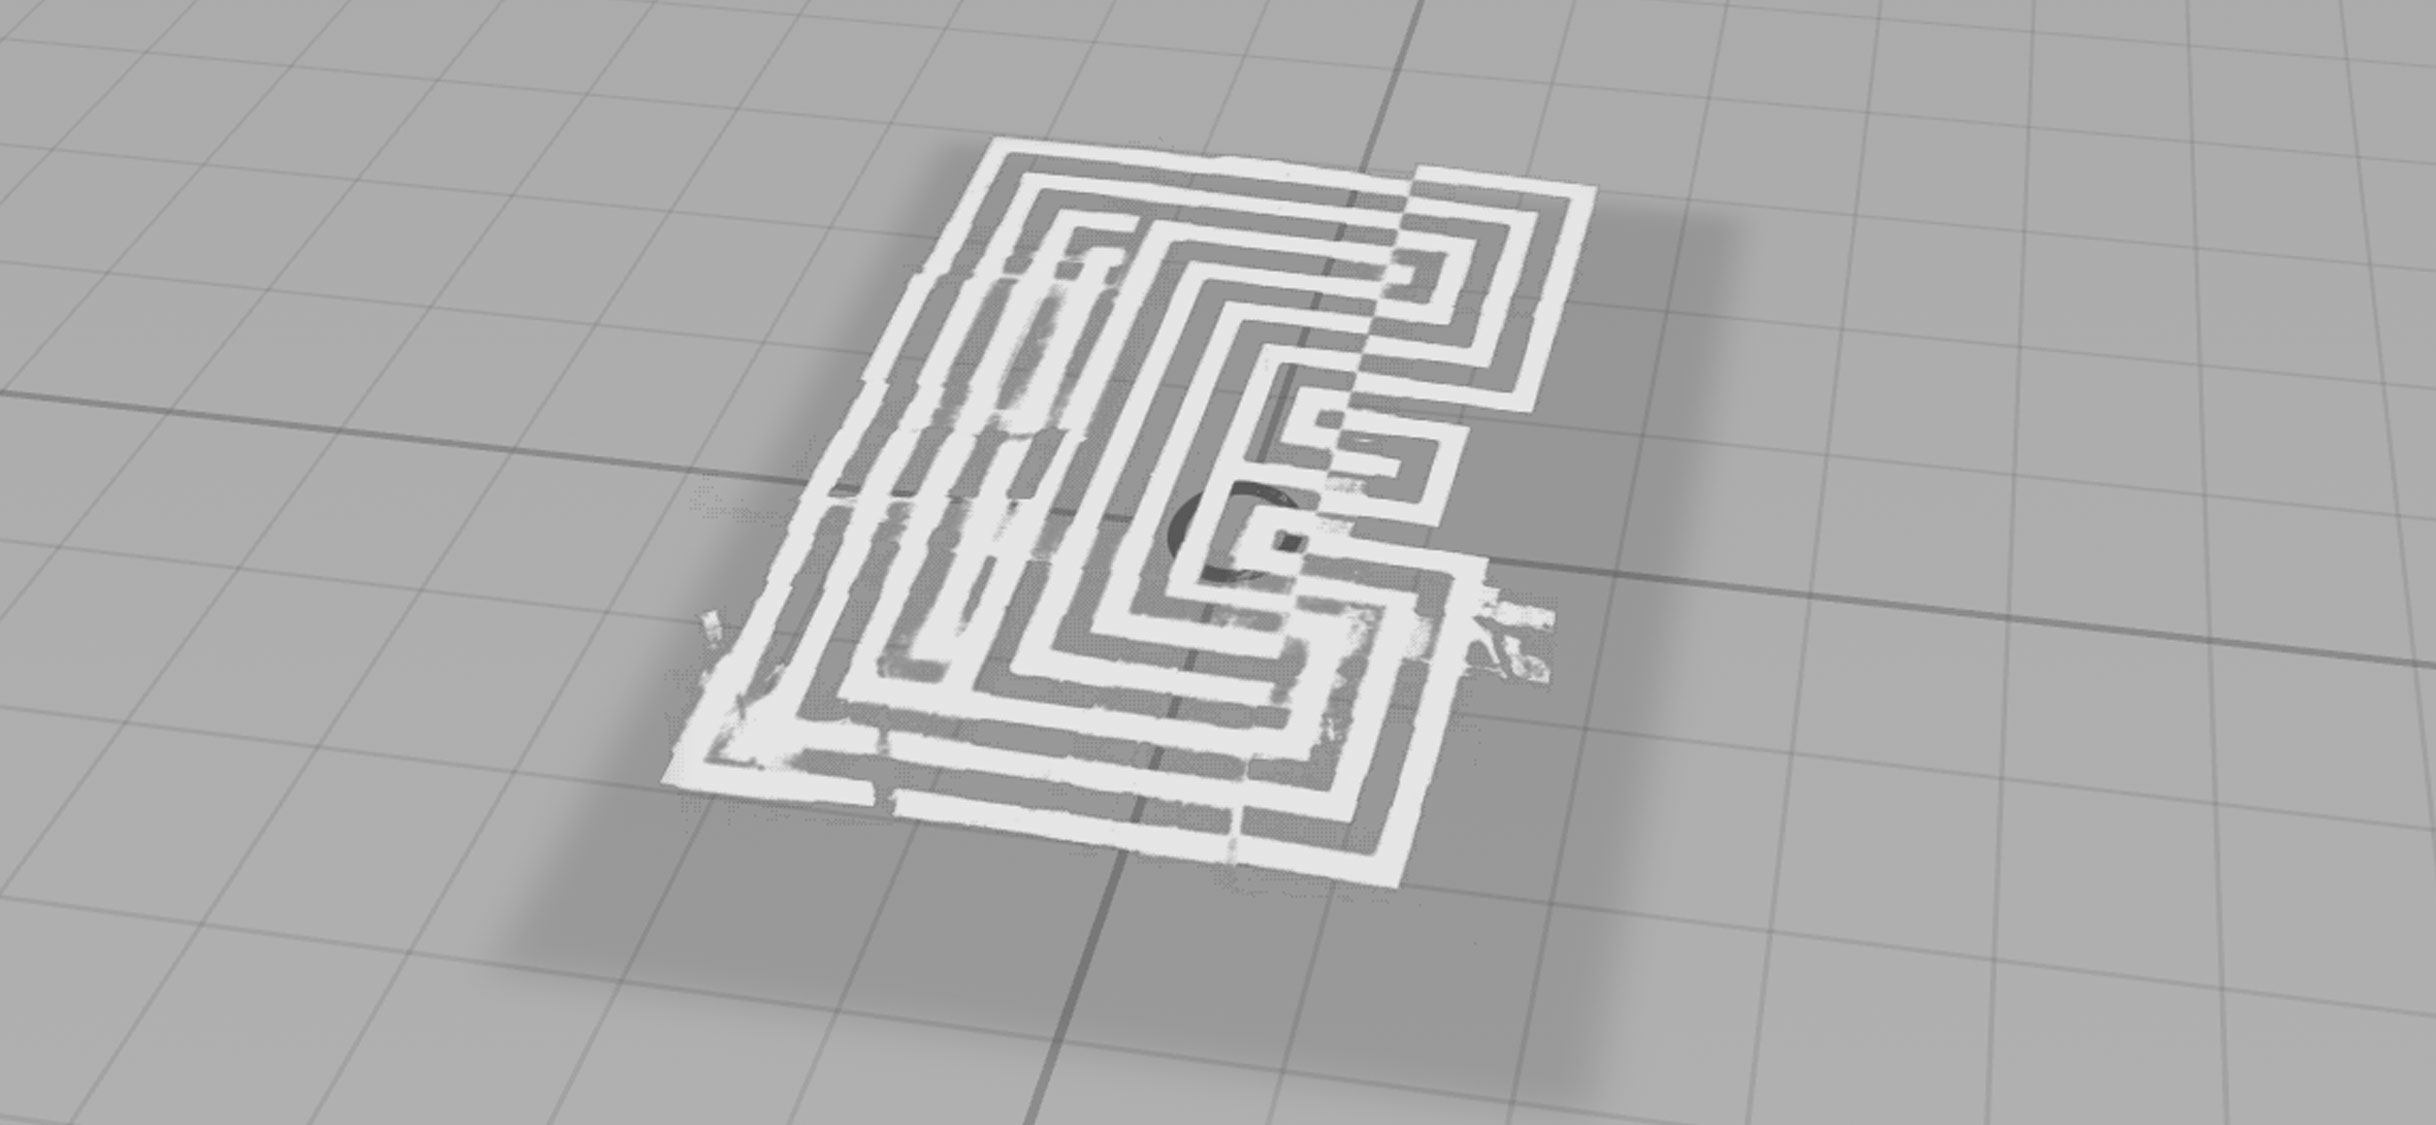
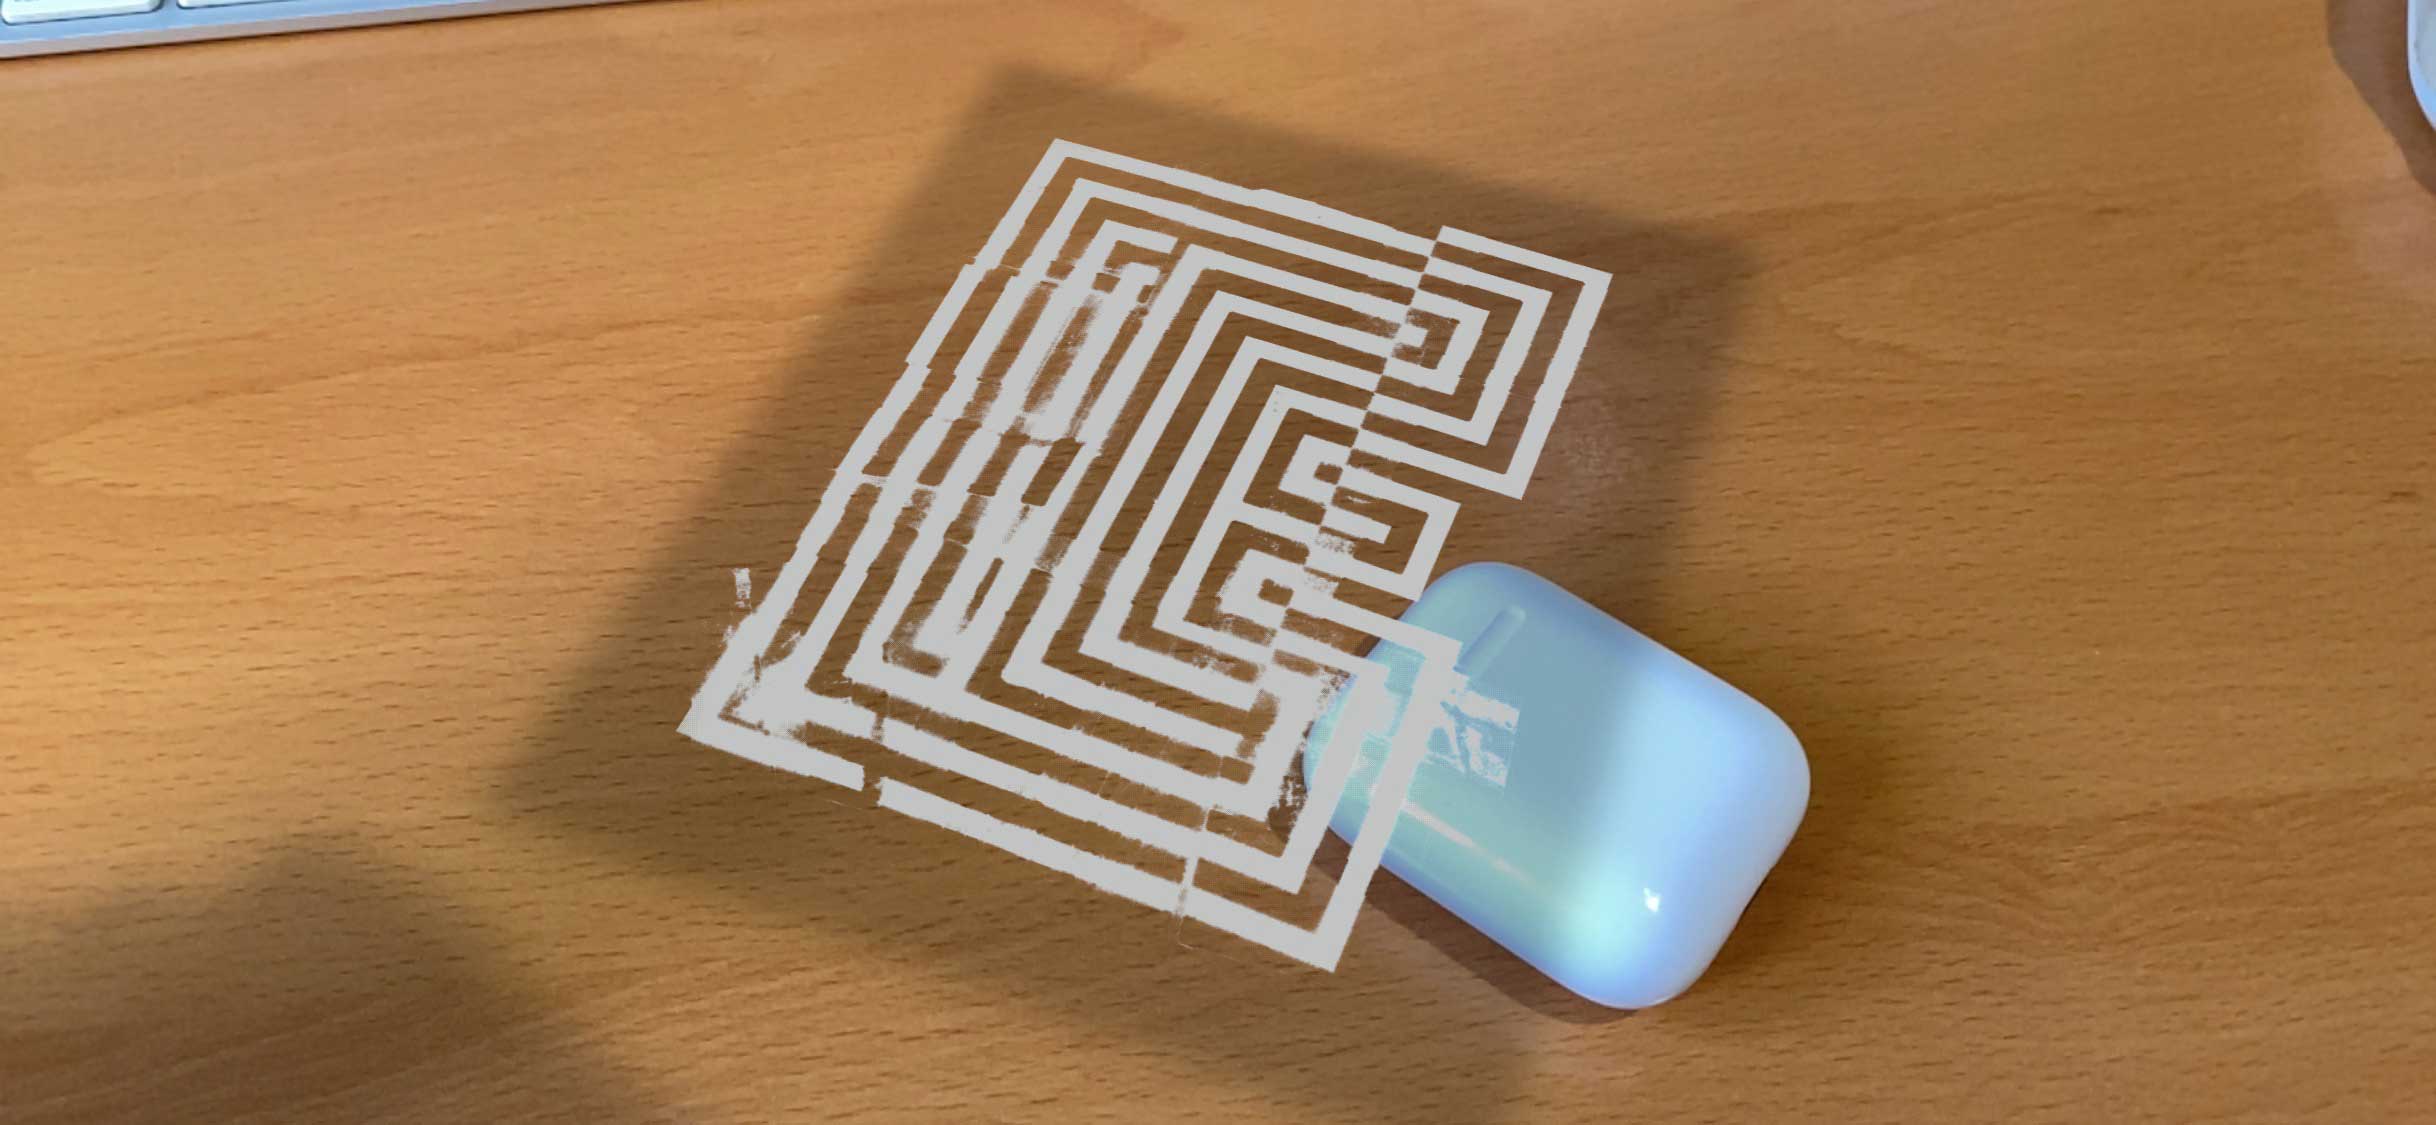
It never really bothered me until I started to experiment with importing vibrantly coloured PNG files into Reality Convertor. No matter what colour space, resolution, compression setting etc, the resulting AR projection looked darker and less vibrant overall. The example images below show a 255/255/255 white PNG which looks noticeably grey in Reality Composer and even more so when viewed in AR Quicklook. You also get a crazy dark shadow based on the overall dimensions of the image, not the alpha mask.
This issue can be replicating with imported 3D elements that have no Emission settings provided. It seems to me that if no settings are found, AR Quicklook defaults to an overall black Emission setting (for both PNG and 3D elements).
So, how to set an appropriate Emission for PNG graphics? There is probably an easier way, but my workaround below:
- import PNG as an image plane into 3D software (I used Vectary)
- convert this into a 3D element (so the PNG is used to create as the Base Colour Texture and the Opacity)
- set Emission at 100% White (looks crazy in Vectary but have faith)
- export as a USDZ object and import into Reality Converter.
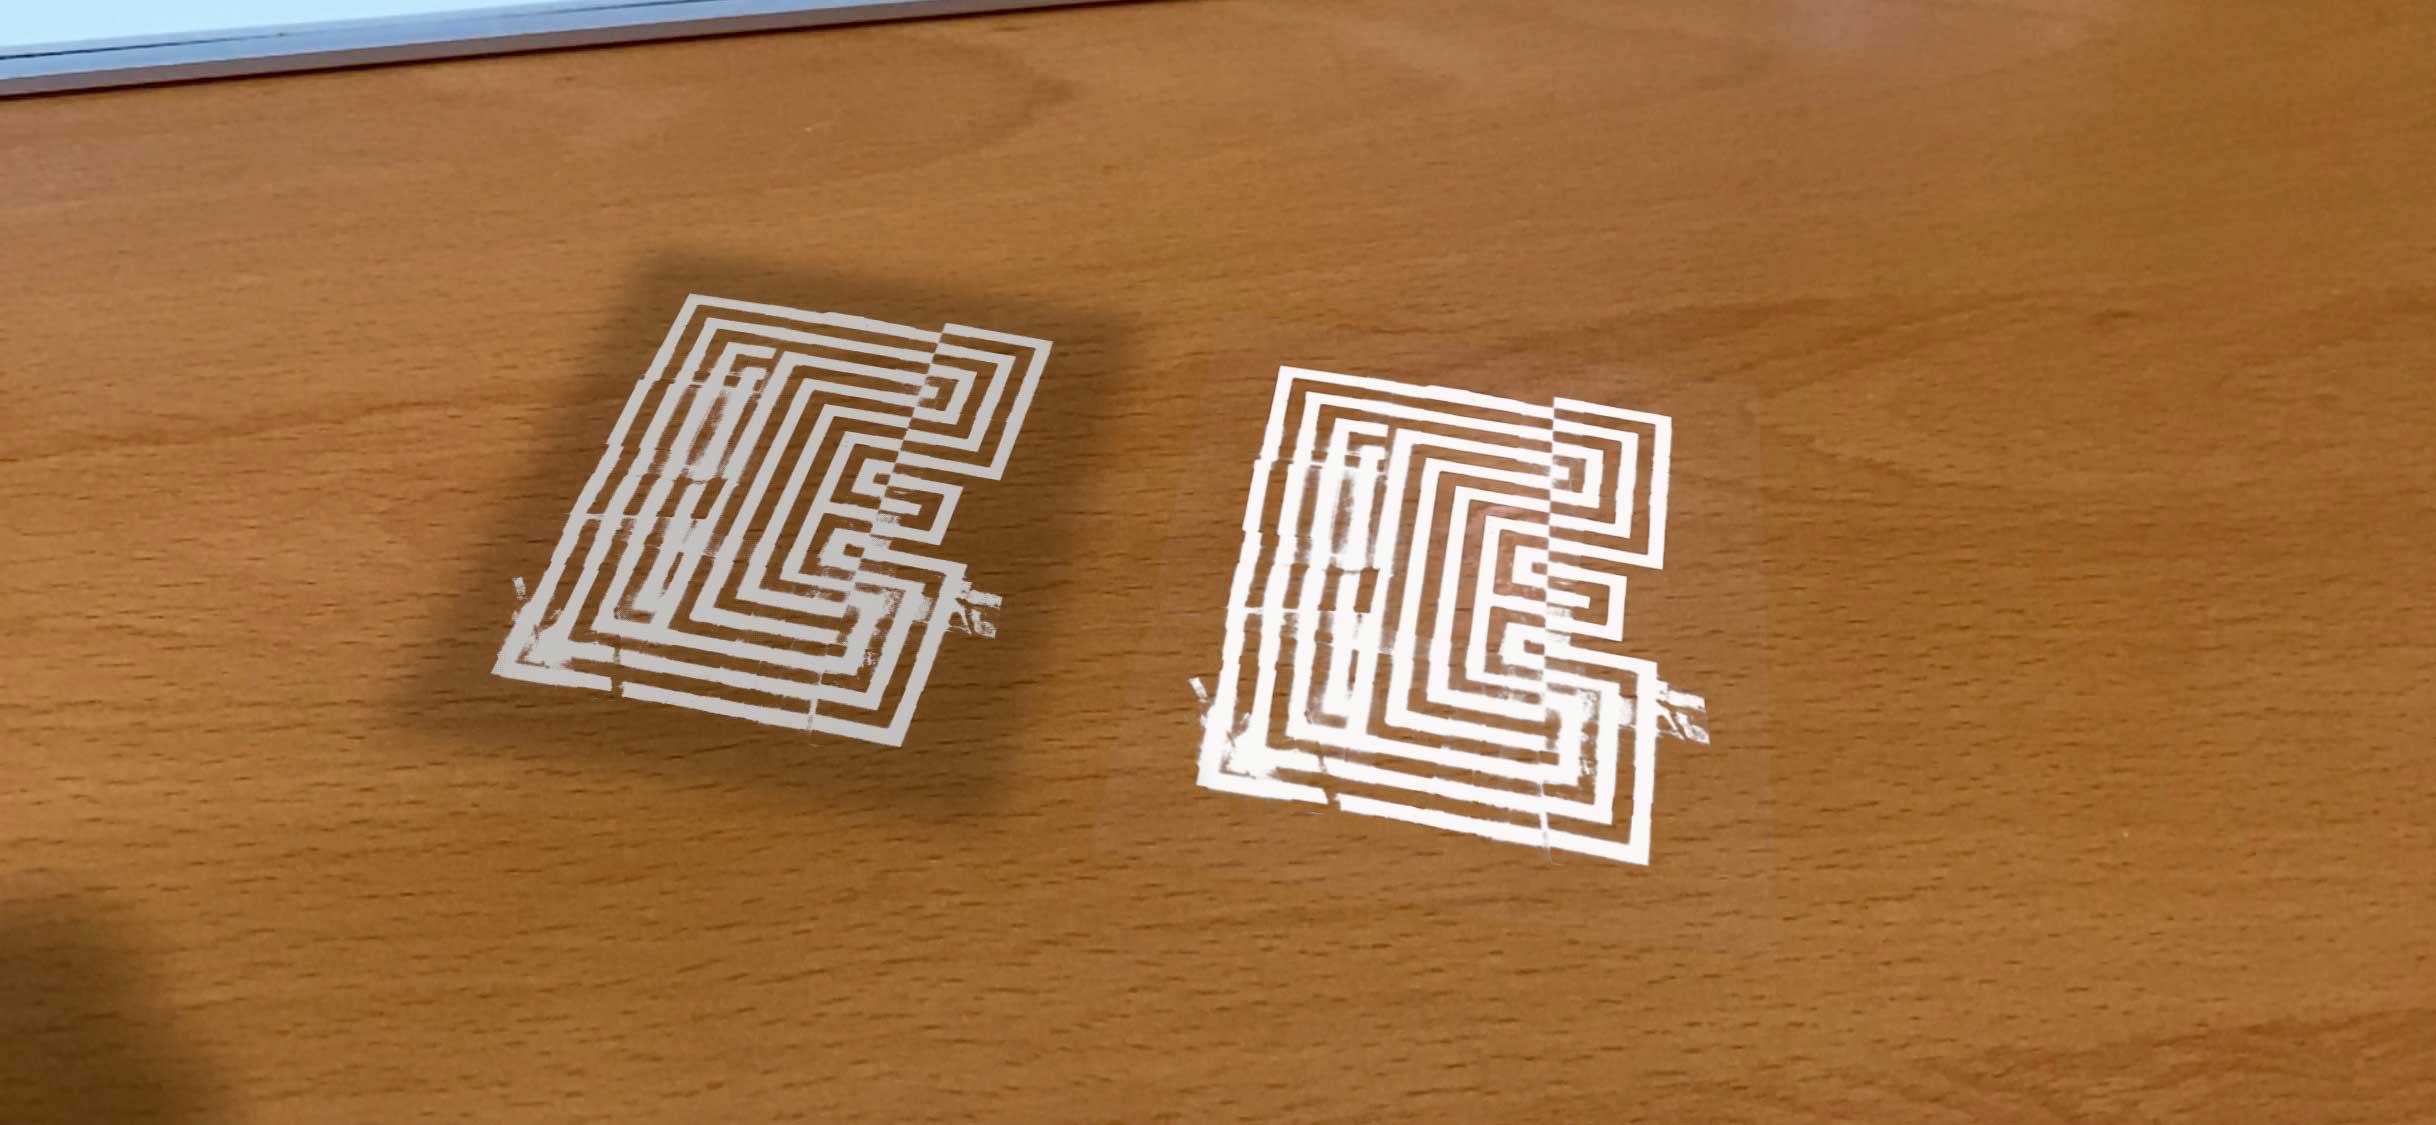
The good news: this renders colours accurately in AR Quicklook and also removes the nasty shadow. The bad news, it also produces a very slight white box across the whole object (image below with PNG on left, USDZ on the right). The white shade stacks, so becomes more noticeable with multiple elements overlapping.
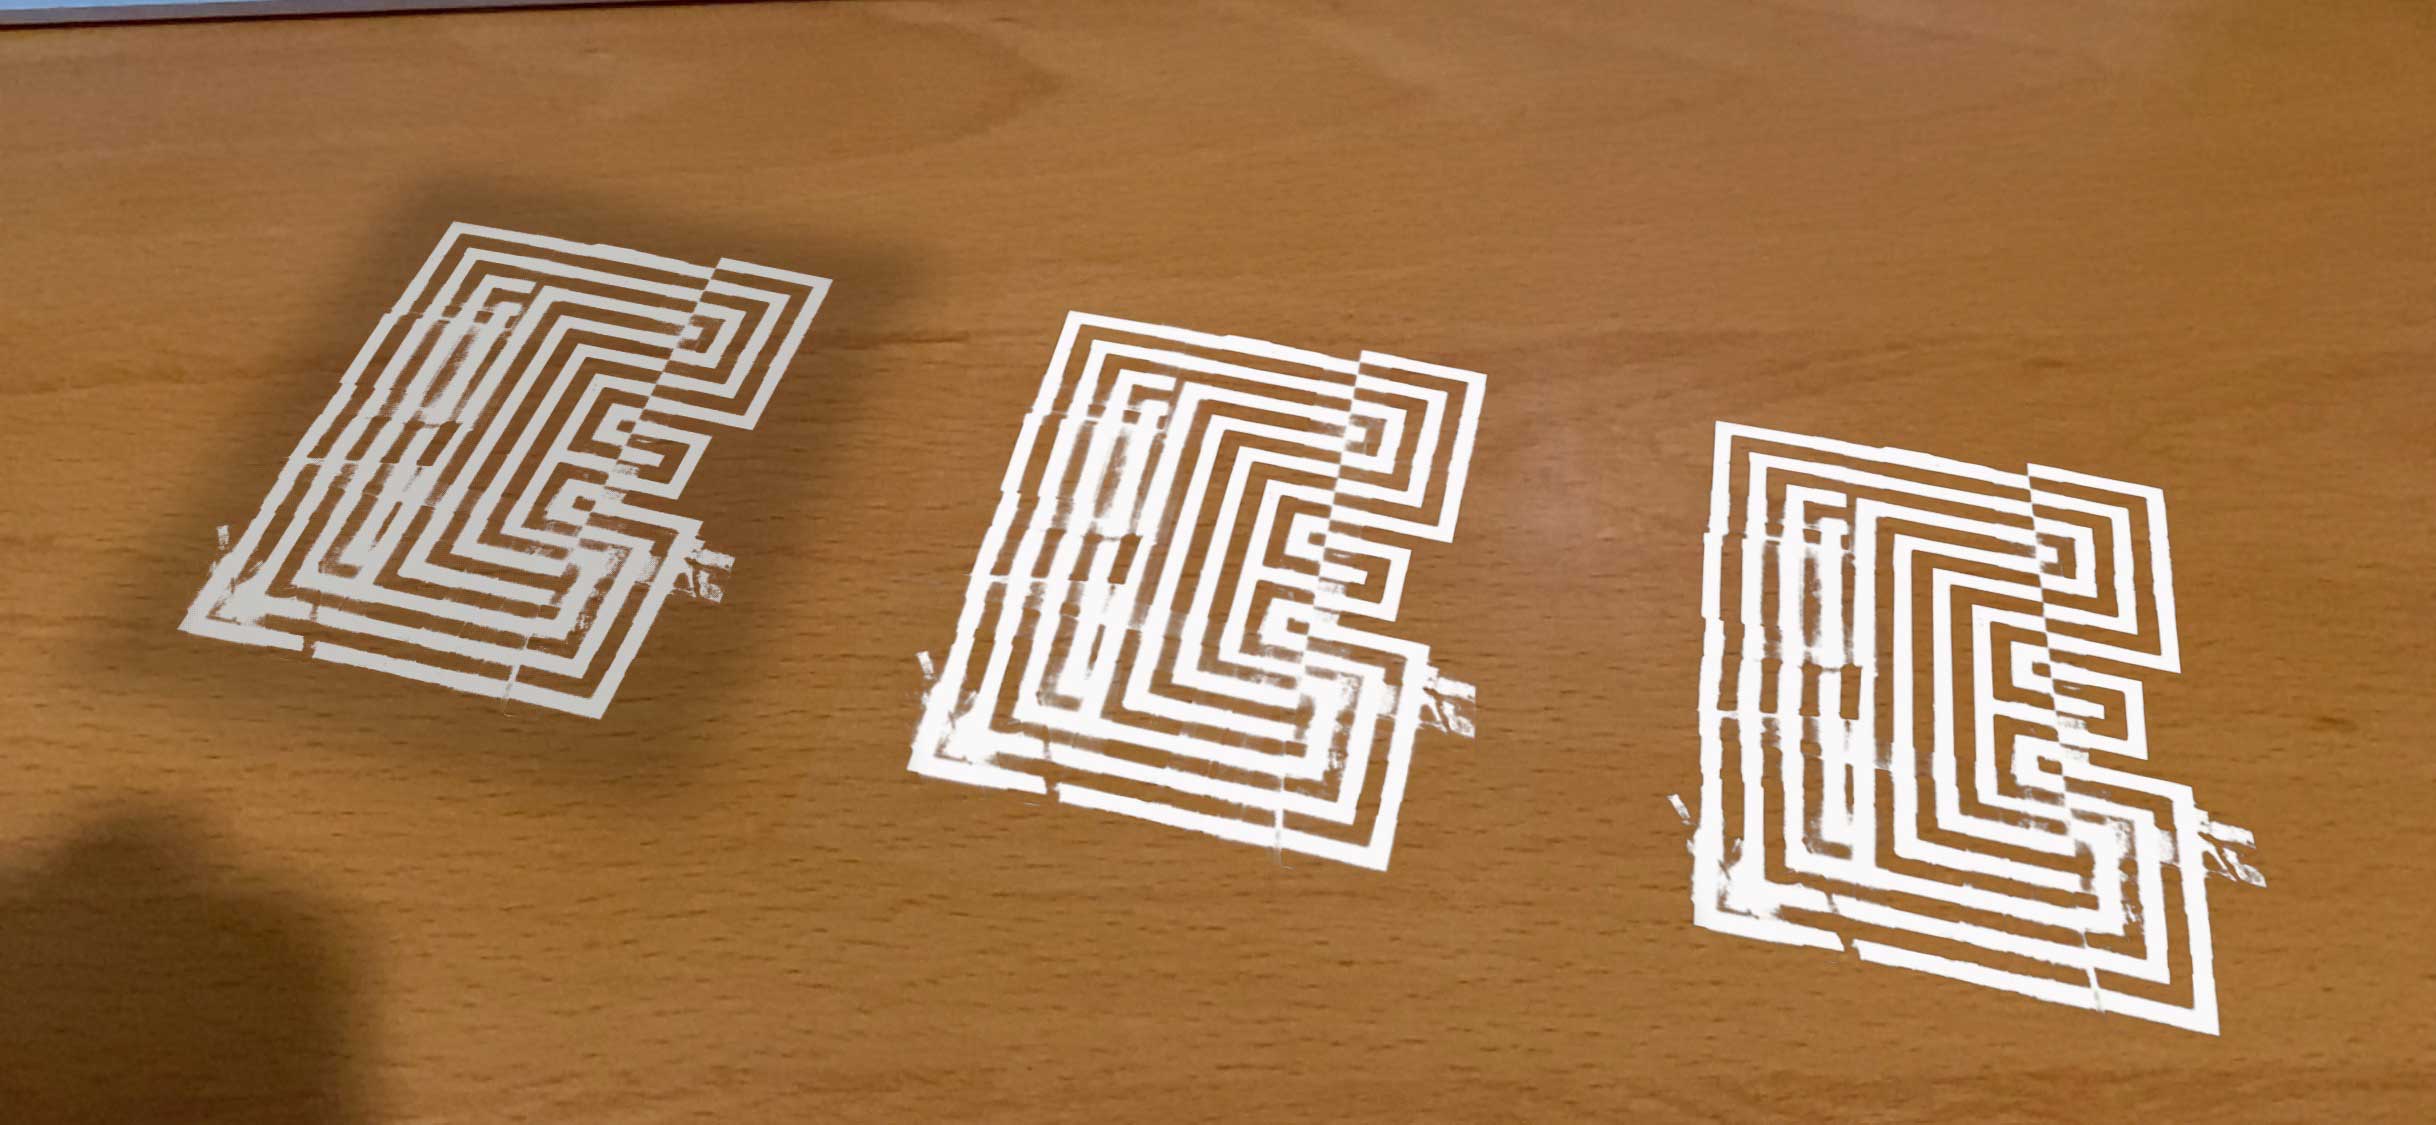
To fix that white box, you need to set the Occlusion to mask out all of the transparent sections. I just used the same texture file as the Opacity setting. This finally provided the outcome I was after (image below with PNG on left, USDZ with 100% white emission in the middle, USDZ with 100% white emission and occlusion mark on the right).
So my workflow is: import PNG to Vectary > convert to 3D > 100% white emission > add occlusion mask > USDZ export > Reality Converter.
This works with colours as well — you can get far more vibrant images displaying in AR Quicklook.
Side effects: I found that when you have multiple overlapping elements treated this way, the very bottom element can sometimes not appear in AR Quicklook. Can be patched by adding a small element at the very bottom.
Anyone out there got a more efficient way? Would love to hear it!
One Comment on “How to fix ‘darker’ looking PNG files in AR Quicklook”
Cool. Nice workaround. Thanks for sharing 🙂